Have you ever wondered why some rope connections seem to defy the laws of physics, holding steadfast under immense pressure? The secret lies in the art of the 3 strand rope eye splice, a technique that can transform an ordinary rope into an extraordinary tool. But here's the kicker: not all eye splices are created equal.
At iRopes, we've revolutionised the game with our fibre rope eye splices that boast unparalleled strength and higher breaking force. Imagine a connection so robust, it elevates your entire rigging system to new heights of reliability and performance.
In this guide, we'll unravel the mysteries of mastering the 3 strand rope eye splice, delve into the advanced world of 8 strand rope splices, and explore the nuances of eye splicing polypropylene rope. Whether you're a seasoned sailor or a DIY enthusiast, you're about to embark on a journey that will transform your rope work forever.
From understanding the basics to tackling advanced techniques, we'll equip you with the knowledge and skills to create eye splices that not only meet but exceed industry standards. Get ready to discover why our eye splices are the go-to choice for professionals who demand nothing but the best in strength and durability.
So, are you ready to elevate your rope game and create connections that stand the test of time and tension? Let's dive in and master the art of the eye splice together.
Understanding the Basics of 3 Strand Rope Eye Splice
When it comes to rope work, mastering the art of the 3 strand rope eye splice is like unlocking a secret superpower. As a seasoned sailor and rope enthusiast, I've found that this technique is not just useful – it's downright essential for anyone serious about their knots and splices.
What is a 3 Strand Rope Eye Splice?
Picture this: you're on a boat, and you need a permanent loop at the end of your rope. That's where the eye splice comes in. It's a method of creating a loop by weaving the rope's own strands back into itself. The result? A strong, durable connection that maintains up to 95% of the rope's original strength. Now that's impressive!

Tools and Materials Needed for Eye Splicing
Before we dive into the nitty-gritty, let's talk tools. You'll need:
- A fid or marlinspike: This is your best friend for separating and tucking strands.
- Sharp scissors or a knife: For clean cuts and avoiding frayed ends.
- Whipping twine: To prevent unraveling while you work.
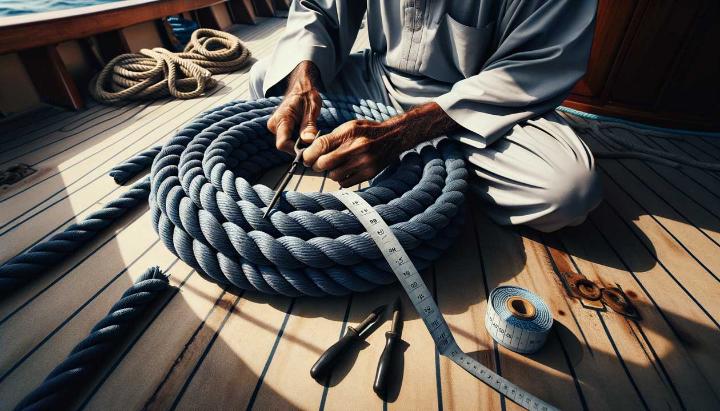
- Tape measure: Precision is key in splicing!
And of course, you'll need your 3 strand rope. But here's a pro tip: not all ropes are created equal. For beginners, I recommend starting with a medium-lay nylon or polyester rope. It's forgiving to work with and holds its shape well.
Step-by-Step Guide to Creating an Eye Splice
Now, let's get our hands dirty! Here's a quick overview of the process:
- Unlay the rope strands about 12 inches from the end.
- Form your desired eye size and mark where the splice will begin.
- Tuck each strand under the adjacent strand of the standing part.
- Continue tucking each strand, following the lay of the rope.
- Repeat for at least three full tucks (five for synthetic ropes).
Remember, practice makes perfect. Don't get discouraged if your first attempt looks a bit wonky – we've all been there!
Safety first! Always wear gloves when working with rope to protect your hands from friction burns.
Mastering the 3 strand rope eye splice takes time and patience, but it's an invaluable skill for any rope enthusiast. Remember, the key to a strong splice is maintaining tension and following the natural lay of the rope. With practice, you'll be creating professional-looking eye splices in no time!
In the next section, we'll dive deeper into the step-by-step process, complete with tips and tricks I've learned over years of splicing. Stay tuned, and happy splicing!
Step-by-Step Guide to Creating a 3 Strand Rope Eye Splice
Ready to dive into the nitty-gritty of creating a 3 strand rope eye splice? As someone who's spent countless hours perfecting this technique, I can tell you it's as rewarding as it is practical. Let's roll up our sleeves and get started!
Preparing Your Rope for Splicing
Before we jump in, let's make sure we're set up for success. Here's what you need to do:
- Measure and mark your rope: Decide on the size of your eye splice and mark the spot where you'll start unravelling. I usually add an extra 15-20 cm to account for the splice itself.
- Unravel the strands: Carefully separate the three strands, making sure not to twist them. This is where patience pays off, mates!
- Secure the ends: To prevent fraying, wrap some tape around the end of each strand. Trust me, this little step will save you a lot of frustration later on.
Remember, proper preparation is the cornerstone of a successful splice. Take your time here - it'll pay dividends down the line.
Creating the Eye Loop
Now comes the fun part - forming that all-important eye loop. Here's how to do it:
- Form the loop: Bend the rope back on itself to create a loop of your desired size.
- Position the strands: Align the unravelled section with the main rope, ensuring the strands lay parallel.
- Mark your entry points: Use a marker to indicate where each strand will enter the main rope. This is crucial for maintaining symmetry in your splice.
Pro tip: The size of your eye loop can affect the strength of your splice. For most applications, aim for a loop that's about 6-8 times the diameter of your rope.
Tucking and Weaving the Strands
This is where the magic happens. We're going to weave each strand into the main rope, creating a strong and seamless connection. Here's the process:
- Start with the middle strand: Insert your fid under the strand of the main rope where you made your first mark. Push the middle strand through.
- Follow the lay: For the next tuck, follow the natural twist of the rope. This ensures your splice remains strong and neat.
- Repeat the process: Continue tucking each strand, always following the lay of the rope. Aim for at least three full tucks for natural fibre ropes, or five for synthetic ropes.
- Taper the splice: For a professional finish, reduce the bulk of the splice by cutting away a third of each strand after the first tuck, and another third after the second tuck.
Remember, consistency is key here. Keep your tension even and your tucks neat for a splice that's as strong as it is good-looking.
Having trouble keeping track of your strands? Try using different coloured markers on each strand. It's a trick I learned from an old sea dog, and it's saved my bacon more than once!
There you have it - a step-by-step guide to creating a 3 strand rope eye splice. With practice, you'll be splicing like a pro in no time. Remember, the key to a strong, reliable splice is patience and attention to detail. Happy splicing, mates!
Advanced Techniques for 8 Strand Rope Splicing
Ahoy, fellow rope enthusiasts! If you've mastered the 3 strand splice, it's time to set sail for more challenging waters. Let's dive into the world of 8 strand rope splicing – a technique that'll take your rope work to the next level.
Understanding 8 Strand Rope Construction
Before we get our hands dirty, let's talk about what makes 8 strand rope special. Picture a rope that's not just strong, but also incredibly smooth and resistant to kinking. That's your 8 strand rope in a nutshell.
- Structure: Eight interwoven strands create a round, firm rope with a smooth surface.
- Strength: Typically stronger and more durable than its 3 strand counterpart.
- Flexibility: Offers a perfect balance between strength and suppleness.
Compared to 3 strand ropes, 8 strand varieties are like the Formula 1 cars of the rope world – high-performance, but requiring a bit more skill to handle.

Step-by-Step Guide to Mastering the 8 Strand Splice
Ready to tackle this advanced splicing technique? Let's break it down into manageable steps:
- Unlay the rope: Carefully unravel about 18 inches of rope, separating all eight strands.
- Form the eye: Create your desired loop size, marking where the splice will begin.
- Prepare for tucking: Pair the strands into four sets of two.
- Begin tucking: Start with one pair, tucking it under two adjacent strands of the standing part.
- Continue the pattern: Work your way around, tucking each pair under the next two strands.
- Repeat the process: Complete at least three full tucks for a secure splice.
- Taper and trim: Gradually reduce the number of strands in each tuck to create a smooth taper.
Remember, patience is key. This process requires more time and attention than a 3 strand splice, but the result is well worth the effort.
Common mistake alert! Don't rush the unravelling process. Tangled strands can lead to a messy, weak splice. Take your time to separate each strand cleanly.
As you work through these steps, you'll notice how the construction of 8 strand rope affects the splicing technique. The tighter weave means you'll need to apply more force when tucking, but it also results in a splice that can retain up to 90% of the rope's original strength. That's some serious holding power!
Now, I know what you're thinking – "This sounds complex!" And you're right, it is more challenging than a 3 strand splice. But with practice, you'll find a rhythm. I remember my first attempt at an 8 strand splice; it looked more like a bird's nest than a professional eye splice. But don't let that discourage you. Each splice you make will be better than the last.
Looking for a visual guide? Check out this detailed video tutorial that walks you through each step of the 8 strand splicing process:
Master the 8 Strand Splice
Watch our step-by-step video tutorial for a visual guide to perfecting your technique.
Remember, mastering the 8 strand splice opens up a world of possibilities for creating stronger, more durable rope connections. Whether you're rigging sails, setting up climbing ropes, or working on heavy-duty marine applications, this advanced technique will serve you well.
So, grab your 8 strand rope, your splicing tools, and dive in. With practice and patience, you'll soon be creating eye splices that would make any seasoned sailor proud. And who knows? You might just find that the challenge and precision required in 8 strand splicing become your new favourite rope craft.
Discover the Strength of 3 Strand Twisted Cotton Rope in SailingHappy splicing, and may your knots always hold true!
Eye Splice Techniques for Polypropylene Rope
As a seasoned sailor who's spliced more ropes than I've had hot dinners, I can tell you that mastering the art of eye splicing polypropylene rope is a game-changer. Let's dive into the world of polypropylene eye splices and discover why they're becoming increasingly popular in the maritime industry.
Characteristics of Polypropylene Rope
Polypropylene rope has some unique qualities that make it a favourite among both weekend warriors and professional mariners:
- Lightweight yet strong: It floats on water, making it ideal for water-based activities.
- Resistant to rot and mildew: Perfect for marine environments where moisture is a constant companion.
- Cost-effective: Gives you more bang for your buck compared to some other synthetic ropes.
But here's the kicker - when it comes to eye splicing, polypropylene rope can be a bit slippery. That's where proper technique becomes crucial.
Safety Considerations and Working Load Limits
Before we get our hands dirty, let's talk safety. Polypropylene rope typically has a safety factor of 5-12 for working loads. What does this mean in real terms? Well, if you're using a 10mm polypropylene rope with a breaking strength of 2,000 kg, your safe working load would be around 400 kg (using a safety factor of 5).
Always err on the side of caution. When in doubt, choose a rope with a higher breaking strength than you think you'll need.
Remember, the splice efficiency affects the overall rope strength. A well-executed eye splice can retain up to 95% of the rope's original strength. That's why getting your technique right is so important.
Step-by-Step Guide to Creating an Eye Splice
Now, let's get down to business. Here's how to create a strong, reliable eye splice in polypropylene rope:
- Measure out about 30 cm of rope for the splice (adjust based on rope diameter).
- Unlay the strands carefully, keeping them in order.
- Form your eye to the desired size.
- Tuck the first strand under an adjacent strand in the standing part of the rope.
- Repeat with the other two strands, always following the lay of the rope.
- Continue tucking each strand at least five times (polypropylene is slippery, so extra tucks are crucial).
- Taper the splice by cutting away half the fibres in each strand after the third tuck.
The key to a strong polypropylene splice? Patience and precision. Take your time with each tuck, and don't be tempted to rush.

Maintenance and Care Tips
Once you've created your eye splice, proper care will ensure it stays strong and reliable:
- Regular inspections: Check for signs of wear or damage, especially around the splice area.
- Clean with fresh water: After exposure to salt water, give your rope a good rinse.
- Store properly: Keep your spliced rope out of direct sunlight when not in use.
Remember, a well-maintained rope is a safe rope. And when it comes to maritime safety, there's no room for compromise.
Mastering the art of eye splicing polypropylene rope takes practice, but it's a skill that will serve you well on the water. With each splice you make, you'll be creating a stronger, more reliable connection. And isn't that what seamanship is all about?
Ready to Elevate Your Splicing Game?
Explore our range of high-quality polypropylene ropes, perfect for practicing your eye splicing skills.
Happy splicing, and may your knots always hold true!
Take Your Rope Splicing Skills to the Next Level
Mastering the art of the 3 strand rope eye splice is essential for securing strong and durable connections, retaining up to 95% of the rope's original strength. In this guide, you’ll learn the basics and step-by-step techniques, whether you're working with a 3 strand rope eye splice, an 8 strand rope splice, or an eye splice polypropylene rope. iRopes offers high-quality ropes with superior breaking strength, ensuring your splices are robust and reliable. For custom solutions tailored to your needs, please fill in the inquiry form above.
